Tutorial: How to add Camo to BF2 Troopers
Posted: Thu Mar 31, 2011 6:14 pm
This is a tutorial that will explain how to add Camo to your BF2 troopers through GIMP.
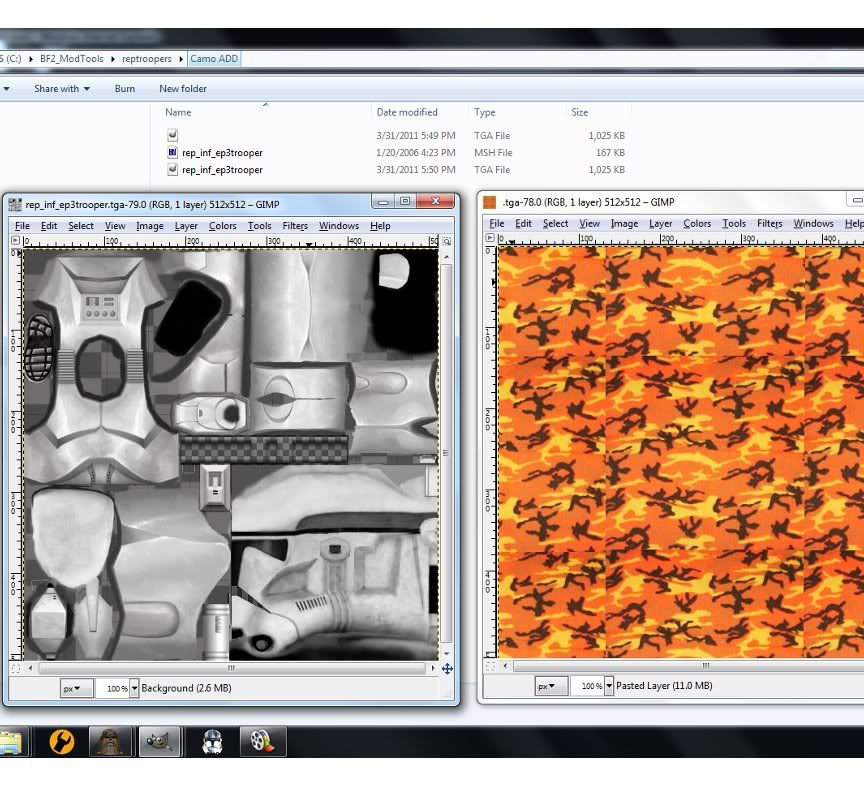
Step1: add your files that are needed to your folder and have your trooper .tga and camo .tga out (they must be the same dimensions)
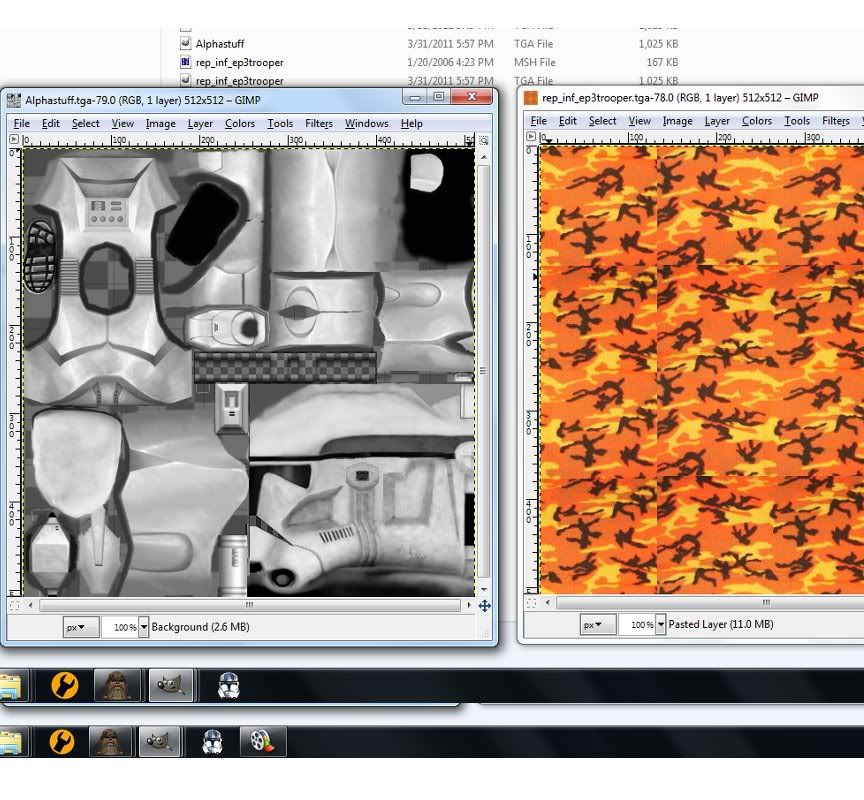
Step2: Rename your camo to Alphastuff.tga (any name will do but be sure to do something you can remember as your stock .tga) and rename your camo .tga to rep_inf_ep3_trooper.tga
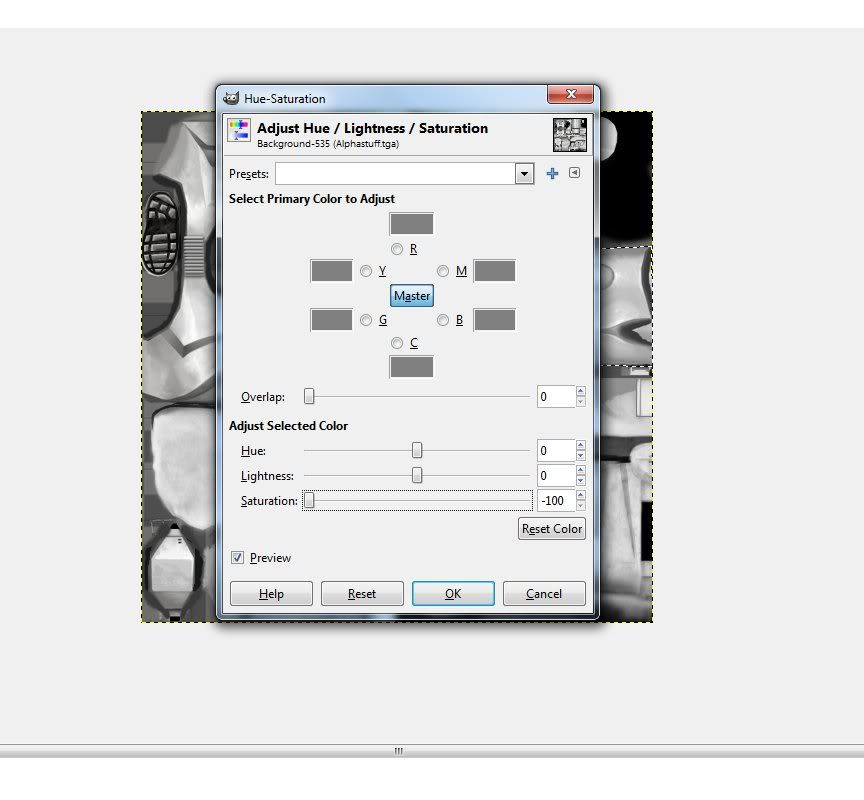
Step3: Go to your Alphastuff.tga and select an area you want to have camo on , then go to colors, Hue-Saturation and set saturation to -100. click ok.
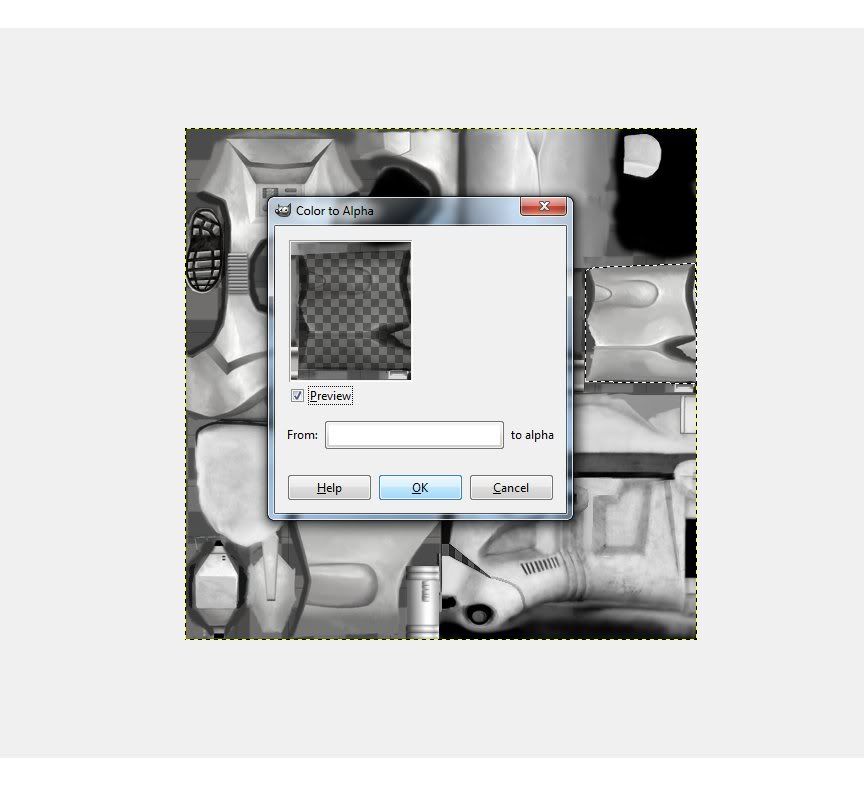
Step4: Now with that same exact area selected go to colors, Color to Alpha. it should look the way it does so don't panic. Click ok.
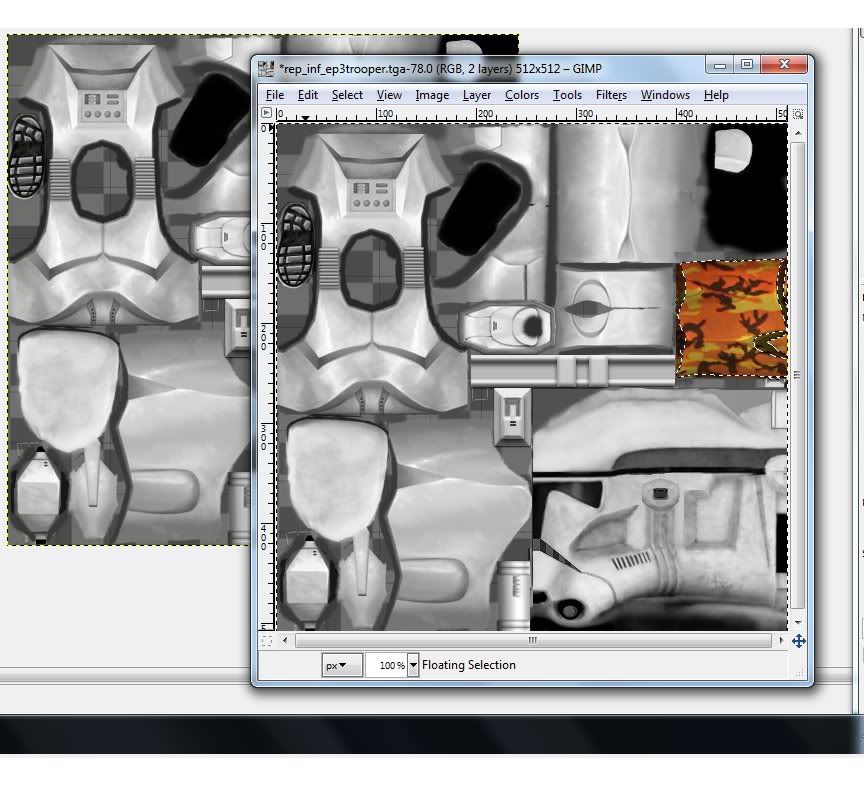
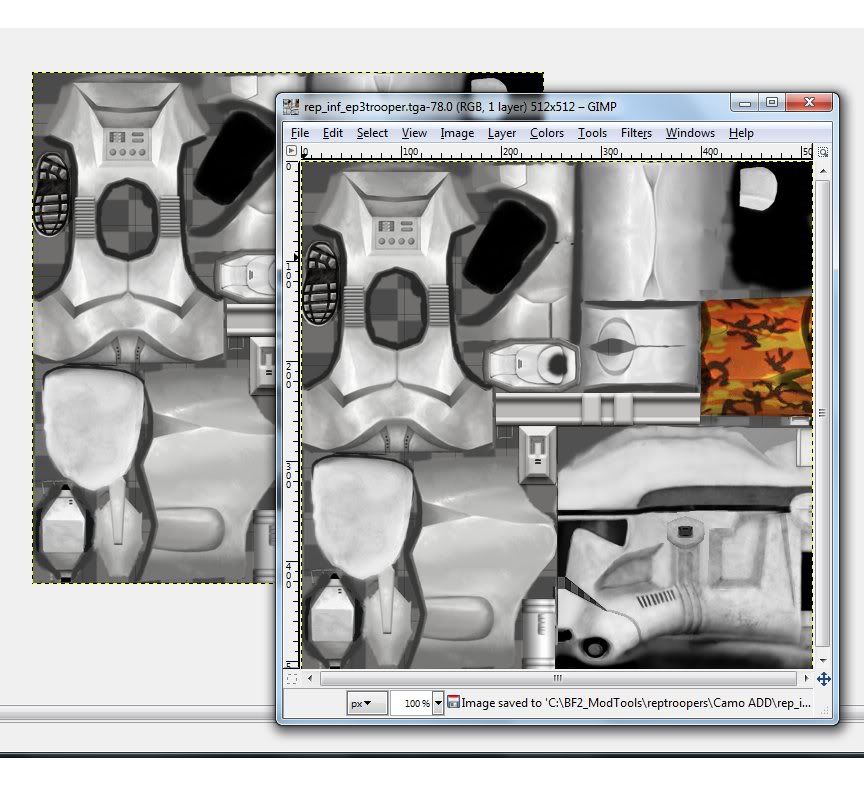
Step5: Deselect your region of alpha and copy the WHOLE! image and paste it over your camo image. then go to image, anchor layer and save. (looks like this)
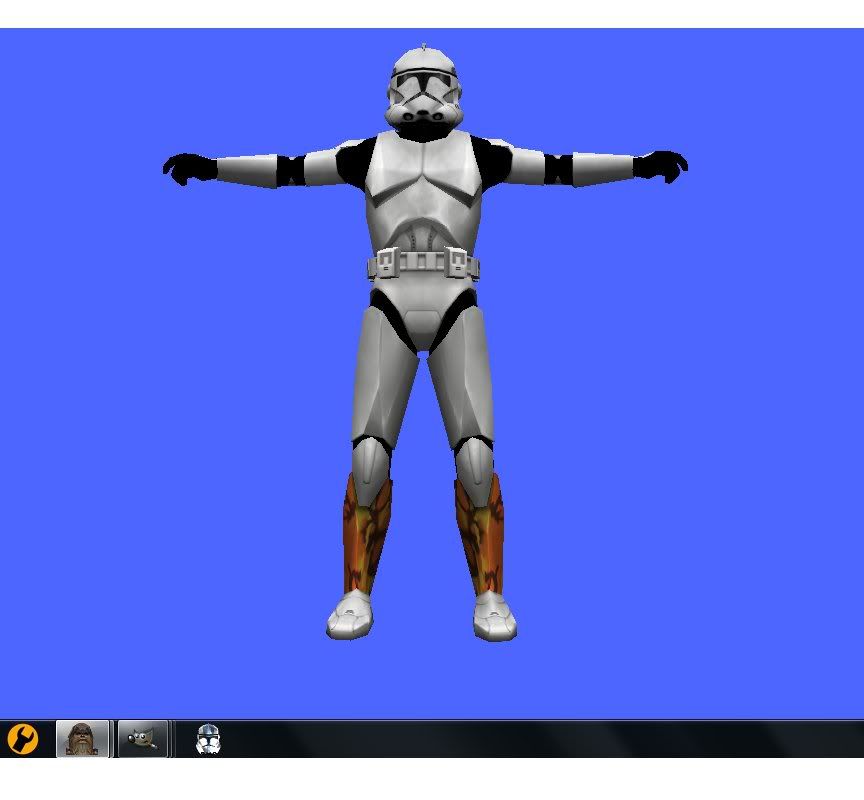
Step6: Now go to your .msh viewer to see how it looks!
Step7: Now that youve learned to do it good job! but remember EDIT UNDO on your Skin you just copied to and only do skinning on the .tga file you named alphastuff and to test copy and paste over your skin with the camo on it. If you leave it there, next time you copy the camo won''t be the layer shown when colored to alpha. Remember to save with RLE Compression off. Frequently save your Alphastuff.tga and never copy over your camo .tga twice in a row without undoing the previous paste. Then just add the skin ingame as any other custom side! 
Step1: add your files that are needed to your folder and have your trooper .tga and camo .tga out (they must be the same dimensions)
Hidden/Spoiler:
Hidden/Spoiler:
Hidden/Spoiler:

Hidden/Spoiler:
Step4: Now with that same exact area selected go to colors, Color to Alpha.
Hidden/Spoiler:
Step5: Deselect your region of alpha and copy the WHOLE! image and paste it over your camo image.
Hidden/Spoiler:
Hidden/Spoiler:
Hidden/Spoiler: