Welcome to GT! If you ever have questions, you really should check out the FAQ located at the top of this forum. It has the answer to your question in there. Specifically, THIS tutorial shows you how to add custom skins without fiddling with the actually units details (health, weapons, etc). If you get stuck, let us know!
If you intend to make a full blown custom side with new models or weapons or anything like that, you should probably just use this full-blown side mod tutorial HERE.
lucasfart wrote:Welcome to GT! If you ever have questions, you really should check out the FAQ located at the top of this forum. It has the answer to your question in there. Specifically, THIS tutorial shows you how to add custom skins without fiddling with the actually units details (health, weapons, etc). If you get stuck, let us know!
If you intend to make a full blown custom side with new models or weapons or anything like that, you should probably just use this full-blown side mod tutorial HERE.
To get your files into a .lvl file, you'll need to "munge" then, Battlefront's way of packaging the files.
The easiest way to make your new .lvl file would be to create a new mod project using the mod tools. Then, you'll edit the side to your liking, perhaps following along with tutorials covering this that lucasfart linked you to. (EDIT: Don't follow along with those- the tutorials he linked to assume you already have familiarity with the mod tools and have your own map.) Finally, you munge the files with VisualMunge, part of the mod tools, and switch out the default .lvl with your newly-made one.
EDIT: This question may or may not have been asked several times recently, so I'm writing a "how do I put this skin in the game?" guide.
------------------------------------------------------------------------------------------- How do I put this skin in the game? A guide for total beginners
So you've downloaded or produced a new skin that you want to use in Battlefront II. The purpose of this guide is to explain to beginners the speediest way to add your skin into the game. The process is actually quite simple: Create a project, use that project to edit side data, and then copy your project's side data into the game's directory.
Note: Before beginning, I will assume you have downloaded the mod tools. - see the FAQ thread here(link above). It would be wise to consult the documentation coming with the mod tools.
Also, here are some terms I will use in the tutorial:
- Sides : One of the factions in the game, such as Republic or Alliance. This also refers to units in general.
- .lvl : The file extension of a BFII data file. These are "compiled" files, so you can't edit them directly.
- .tga : The file extension of a BFII skin file. This changes the color of the model of the unit.
- .msh : The file extension of a BFII model file. This changes the physical shape of the unit.
So, a quick summary: We are going to use the mod tools to create a copy of the game's normal .lvl file, except containing a new skin for some unit instead of the default one.
Step 1: Creating the project
Unfortunately, the mod tools do not allow one to simply edit one's copy of the game right off the bat. In order to generate files that can replace the default game files, we need to create a new project. This is done using the mod tools and running VisualMunge (contained in the template "data" subdirectory) for the first time. Since you're only interested in the skin, it doesn't matter what you name your map or the gamemodes that you check to be added in. After you create the project, you should find a data_*** - where *** is the map ID you picked - project folder under BF2_ModTools.
Step 2: Creating a side folder
Next, we need to grab the source files for the side of the unit you want to reskin. We need all of the source files because the file that contains your new skin will replace the default game data (and if anything was missing, it couldn't be loaded into the game!). I will assume the side being edited is the Republic, rep. First, go to BF2_ModTools/Assets/Sides and copy the folder for rep and common to your map's side folder, BF2_ModTools/data_***/Sides. At this point, we could build the project and generate a complete duplicate of the default side. So, just to review, at this point you should have a folder called rep and a folder called common in BF2_ModTools/data_***/Sides.
Step 3: Edit the sides
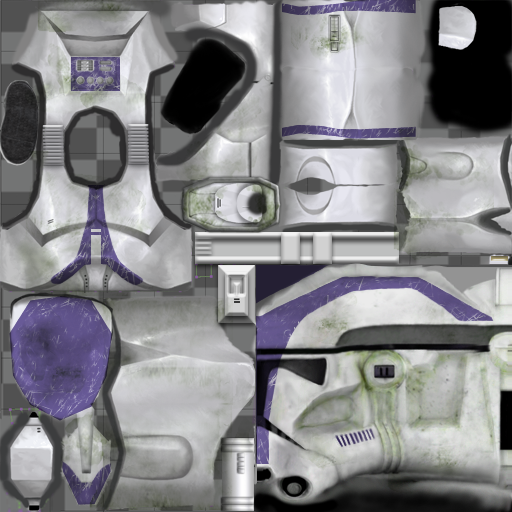
From here, you can edit the default side to your liking. Be warned, however, that if one changes the gameplay properties of a unit, (.odf files and similar) rather than only a visual change (.msh, .tga files and similar), normal online play will be prevented. For this tutorial, I will assume you have a skin for some unit on the rep side (perhaps it is the Episode 3 Clone Trooper). The files regarding visual changes are located in the msh subdirectory of the rep folder. First, find the model - the .msh file - of the unit you are looking to reskin. In this case, that would be rep_inf_ep3trooper.msh. Now, this is the file that has the physical shape of the unit. For a reskin that uses a new model, you would need to replace this file. Since we are just changing the skin, however, we can just edit the texture - the .tga file. Find the .tga file that your model uses (usually they have the same name) and replace it with your skin.
Step 4: Build the sides
Now that you have edited the sides to your liking, it is time to build the sides. Go to BF2_ModTools/data_***/_BUILD. Now, run VisualMunge. When the menu appears, you need to select the side you edited, REP, in the Sides drop-down list. Then, check the box for Common. Finally, hit Munge. The executable will now process your side source files and create .lvl files - our goal! Errors that are produced here can help you find your problem (more) easily, and are useful to people trying to help you.
Step 5: Replace the files
If the munge completes without errors, you are in business! Navigate to the directory for built .lvl files, BF2_ModTools/data_***/_LVL_PC. Find the .lvl file that you wanted to replace in the first place and copy it to your Battlefront II data directory! (Don't forget to back up the original!)
If you are stuck on any of these steps, at least now you will understand the overall goal of what you are doing and be able to post easier-to-understand requests for help. If you are interested in editing more in the sides, you can look for help on the FAQ thread.
Also, if you've successfully completed this tutorial, you may be interested in created new sides for only your map - you could change the name of units or even add new units. This also is less risky than replacing the data for the game. If you want to make a new era, in the vein of Battlefront Extreme or The Dark Times, see the link posted in the above post regarding "era mods." (er, "full-blown side mod.")
My problem right now is when I run it to test it, battlefront says it is missing the mission.lvl file. I looked in the add on file and it is missing the mission.lvl file. In fact, the only thing in there is an empty _LVL_PC folder
Step 5: Replace the files
If the munge completes without errors, you are in business! Navigate to the directory for built .lvl files, BF2_ModTools/data_***/_LVL_PC. Find the .lvl file that you wanted to replace in the first place and copy it to your Battlefront II data directory! (Don't forget to back up the original!)
If you are stuck on any of these steps, at least now you will understand the overall goal of what you are doing and be able to post easier-to-understand requests for help. If you are interested in editing more in the sides, you can look for help on the FAQ thread.
Also, if you've successfully completed this tutorial, you may be interested in created new sides for only your map - you could change the name of units or even add new units. This also is less risky than replacing the data for the game. If you want to make a new era, in the vein of Battlefront Extreme or The Dark Times, see the link posted in the above post regarding "era mods." (er, "full-blown side mod.")
Everything goes well until this step. When I set the sides to rep and check common and click munge this comes up under munge output:
"Munging addme.lua...done.
Copying files to Battlefront II directory:
"C:\BF2_ModTools\data_XXX"
Creating "addon" dir in BF2 dir...done.
Creating mod dir "XXX" dir in addon dir...done.
Copying addme.script to mod dir...done
Copying "mission.lvl" to modDir\data\_LVL_PC\...done
Copying "core.lvl" to modDir\data\_LVL_PC\...done
Copying "XXX" to modDir\data\_LVL_PC\...done
Copying "SIDE" to modDir\data\_LVL_PC\...done
Munge process finished
\Common was unexpected at this time."
I went to my star wars battlefront folder (Note: I did this twice, one was set to the battlefront folder and the other was set to the mod tools folder), opened up my map (Titled XXX) There are two files in there. An "addme.script" and a data folder. In the data folder there is a _LVL_PC folder (Now, I know all the files should be in that folder) When I open the folder it is empty.
When I switched it over to the modtools folder and ran it, I couldn't find any of the files and folders.
Is there any more help you can provide? (Btw thank you for everything you have provided already)
CressAlbane wrote:Looks like you are having the problem that can be solved with THIS. Hope this helps.
That worked!
I now have only one problem and one question:
My problem is when I run the map, instead of the new skins I have it is using the default skins (I made sure that I added the custom skins and not the default) I am going to try again, but is there any reason why that happened?
My question is:
Will I be able to add the files to
Star Wars Battlefront II/ GameData/Data/_lvl_pc/side and be able to play on the default maps with the skins?
Yes, and until you replace that file, your custom map will still show the default skins, since custom maps load from the stock game unless you specifically tell them to read a different .lvl file in the .lua script file.
CressAlbane wrote:Yes, and until you replace that file, your custom map will still show the default skins, since custom maps load from the stock game unless you specifically tell them to read a different .lvl file in the .lua script file.
When I take the rep.lvl and the repshell.lvl from
BF2_ModTools/data_***/_LVL_PC/SIDE and put them in
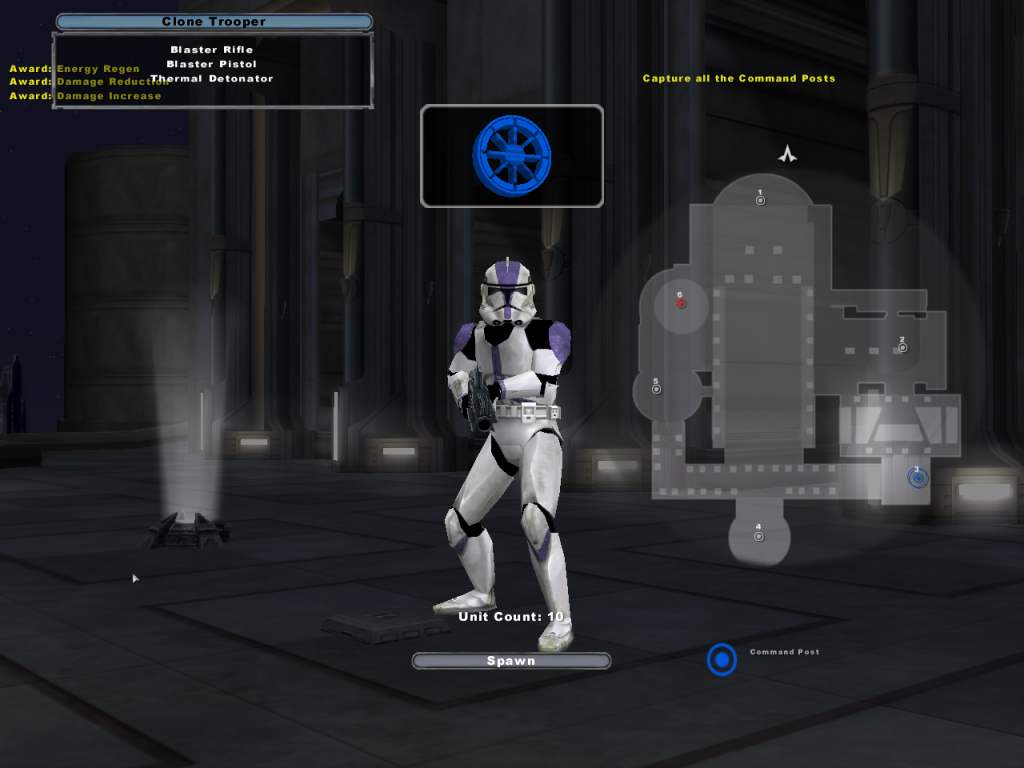
LucasArts/Star Wars Battlefront II/GameData/data/_lvl_pc/side and turn on battlefront everything works fine. When I entered the map all I see is one clone trooper on the spawn list. The only color he has is black (it is just the default black mesh). When I run it on a default map all I see is the black mesh
Just a note: You don't need repshell, cisshell, or any sideIDshell files unless you're creating a custom galactic conquest. You can go ahead and delete their .req and .lvl files, they only take up unnecessary space.
CressAlbane wrote:Maybe you had a problem editing the side. Did you make sure to have the skin be the same name as the normal skin?
Yes, the name for the normal trooper is "rep_inf_ep3trooper.tga" correct?
I wanted to post what I have made but I can't upload it in a post
EDIT
Marth8880 wrote:Just a note: You don't need repshell, cisshell, or any sideIDshell files unless you're creating a custom galactic conquest. You can go ahead and delete their .req and .lvl files, they only take up unnecessary space.
Can you do me a favor?
Can you take your default skins and put them in dropbox, then send me the download link? I have misplaced my original shells
Double posting is against the RULES; please EDIT your post instead -Staff
So everything works now. The skins are added into the game. The one problem now is that you can only play as the clone trooper, not any of the other classes. Is there a way to change that?
You need to be a bit more specific. Why can't you play as the others? Are they locked still, or do they not show up? If they're locked, you can add setclassproperty("PointsToUnlock, #) to your lua to get them unlocked sooner (where # is the number of points you want to unlock at).
lucasfart wrote:You need to be a bit more specific. Why can't you play as the others? Are they locked still, or do they not show up? If they're locked, you can add setclassproperty("PointsToUnlock, #) to your lua to get them unlocked sooner (where # is the number of points you want to unlock at).
CressAlbane wrote:Did you try it on the stock map? Could be a problem in your custom map's LUA script.
I tried it on a stock map, yes. They don't show up